
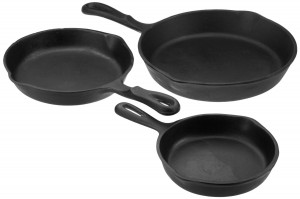
 Cast iron cookware, generally speaking, is a kitchen staple. Not only do people use this type of cookware for its rustic, cabin-like look but also for its ability to last a really long time. Unfortunately, most people don’t know the proper way to use cast iron and in the end, find themselves with a heavy piece of cookware completely covered with stuck on food that has no intention of ever coming off!
Because no one wants to find themselves in this situation with hours lost at the kitchen sink, here’s a summary of why you should and how to season cast iron cookware.
Why Should You Season Cast Iron Cookware
Unlike many pots and pans you’ll find at the store, traditional cast iron comes straight to you with a stick-on surface. This means that anytime you cook food in it, be prepared for some of the food to stick to the cast iron itself. What you want to do now is turn your cast iron into a non-stick pot or pan. Once you do this, you won’t have to worry prying leftover food off its surfaces.
Video Instructions for Seasoning & Cleaning Cast Iron Cookware
If you’d rather watch a video to see how to clean and season cast iron, here’s a good one by the one and only Martha Stewart. Detailed instructions are below if you’d like to print them out or keep them handy while seasoning your cast iron.
Detailed Cast Iron Cookware Seasoning Instructions
Step 1: Gather your supplies
Because you’ll need more than your cast iron, you’ll want to gather all your supplies together beforehand. This will make the process a little easier for you. You’ll need your cast iron, a sponge or some sort of stiff brush, vegetable oil, butter or pretty much any oil you would like (some prefer olive oil), a clean dry cloth or kitchen towel and some dish soap, preferably Dawn soap. If you don’t have a kitchen towel, or rather not use the one you have, you can always use some paper towels in its place.
Step 2: Preheat your oven
Yes, you read that right. In order to successfully season your cast iron, you’re going to need that oven. The ideal temperature to set it to is 325°F.
Step 3: Wash and dry
While you’re waiting for the oven to heat up, you’ll want to now wash and dry your cast iron. To do this, you’ll first wash the cast iron with warm soapy water. The amount of soap you use it up to you, just make sure that you get it all off when you’re done washing. This is also when you’re going to want to use that sponge or brush. Once you’ve got all of the soap off and are confident that it’s ready to go, it’s time to dry the cookware. Make sure that it is completely dry, you don’t want any water droplets left in it. This water will just end up creating ‘bubbles’ between your oil.
Step 4: Seasoning your cast iron cookware
Now that your cookware is all washed and dried, it’s time to get to the main event. Using either your paper towels or your kitchen towel, you’ll now apply a thin coat of oil or melted butter to both the inside and outside of the cast iron. When using melted butter, make sure that it is melted enough to be the same consistency of oil. During this quick process, you’ll also want to make sure that the cookware is coated evenly, otherwise your cast iron may end up looking a bit uneven and off putting.
Step 5: Baking your cast iron
The final step is to place the cast iron upside down in the oven. It’s best to put the piece on the center rack as this will allow for a more even seasoning process. If you’re not a fan of cleaning your oven, this is also the time you’ll want to put a large piece of aluminum foil on the rack below. The aluminum foil will catch any drips.
There are lots of opinions out there, but most feel that an hour in the oven is enough to complete the seasoning process. If you’d like though, you can leave it in for another 10 minutes, though it’s best not to season for any longer than that. After the hour is complete, it’s time to open that oven door, but wait, you’ll want to stop there! Because the cast iron will be very hot, it’s best to leave the cookware in the turned off oven to let it cool.
When Should You Re-season Your Cast Iron
Though your original seasoning should last a long time, it won’t last forever. This means that you’ll have to re-season your cast iron from time to time. When that time does come, you’ll follow the same instructions, making the process painless and easy. Just keep in mind that a piece of seasoned cast iron should be smooth, non-stick and shiny. Once your cast iron starts to lose any of these qualities, that’s when you know it’s time to start all over again.
Cleaning Cast Iron Cookware & Helpful Tips
Because not all of us are cast iron connoisseurs, here are some helpful tips to keep both you and your cast iron in good shape:
- Never ever leave your cast iron submerged in water. This will cause your beautiful cookware to turn into a rusty mess.
- Never clean with soap. Even though you’re allowed to clean with soap when you first get your cast iron, you don’t want to clean with soap after it’s been seasoned. A good wipe down will do just fine. Leaving the oils on the pan will help improve & keep it’s seasoning with normal use.
- Cast iron is slow to heat and slow to cool. Give yourself plenty of time to get to a desired temperature and make sure that it becomes stable at that temperature before cooking. Why? Because if it keeps heating, you turn down the heat to try to cool it – it will cool – but very, very slowly and your food can easily become overcooked or burned.
- Cast iron retains its heat for a long time. This means that you’ll want to be very careful when moving it after cooking. It’s best to let it sit and cool on its own. Some people will even put a mitten or towel on top as a reminder that it’s still hot.